
This article is entirely for the beginners who are in a way to start their own website or a blog. In this article, I am going to show you how to buy a domain name online.
Step by Step Guide on How to Buy Domain Names from Godaddy.com Website
There might be a number of sites on the Internet but I would suggest Godaddy.com. So get yourself a pen and paper to get yourself a domain from Godaddy by following these steps.
Transfer Domain from one Godaddy Account to Other Godaddy Account
Steps to Buy a Domain Name from Godaddy.com
Here is the step-by-step process to purchase any domain name from a famous website Godaddy.com.
Step 1: Gmail Account
The first step you have to do is creating a Gmail account. If you already an existing user then use that Gmail ID for the purchase.
To this Gmail account, you will receive the verification Email of your Godaddy account, purchase details, Expiry details, Offers, etc.
Step 2: Visit Godaddy.com website
There are two ways to visit Godaddy website. One is direct and the other is Google search method.
Direct Method:
In this method, type the website title www.godaddy.com and visit the website. When you are visiting the website directly you may or may not be available for the ongoing offers. If you are a new user, the offer will be applied. If you are confused about finding the offer follow the indirect method.
Indirect Method – Google Search
In this method, type Godaddy low price domains in google and click on search button. Click on the first result of Godaddy offer link and visit the website.
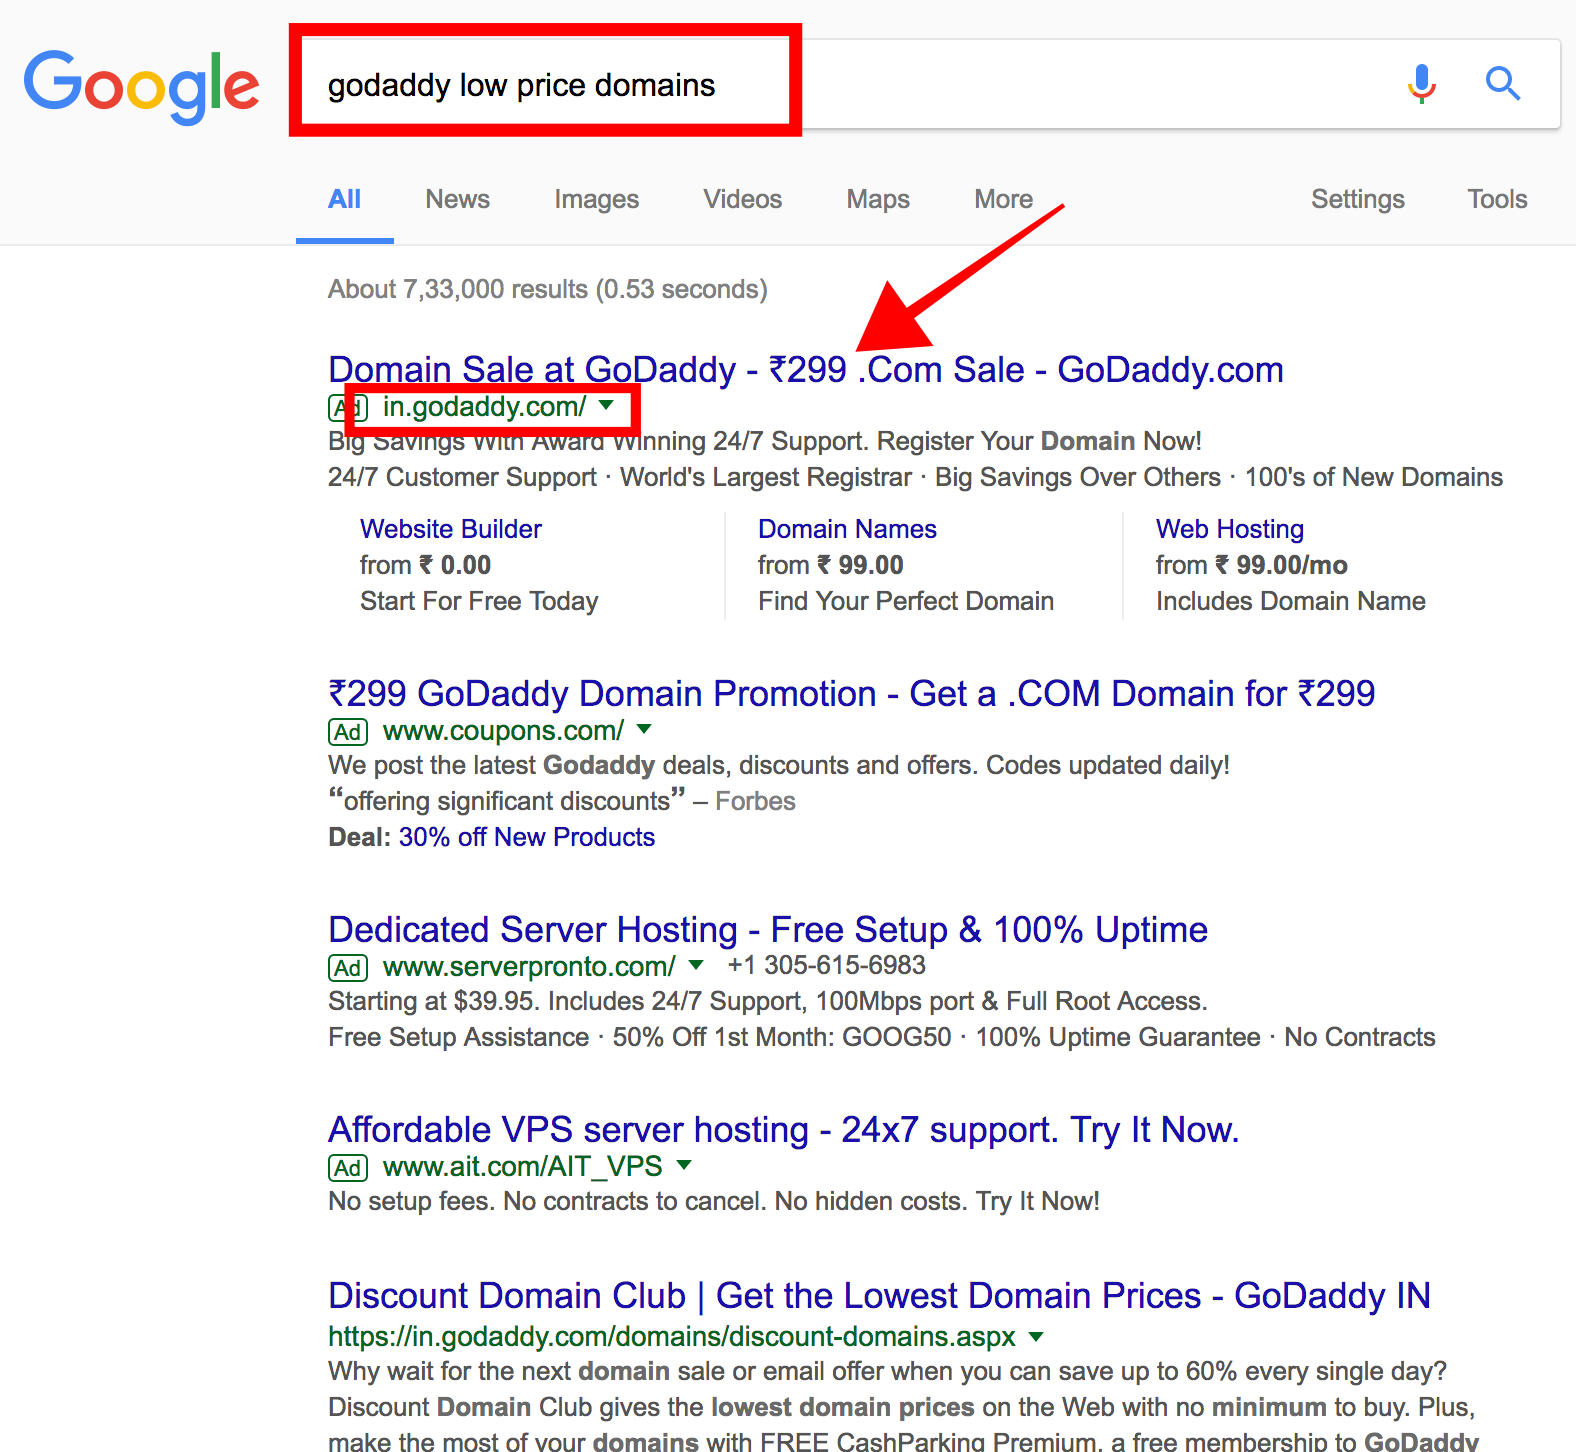
In this way, you are directed to the offer page and the offer is applied by default.

Step 3: Search Domain Name
After visiting the website, type the domain name you want to buy in the search bar and click on the search button. You can select any extension like .com, .in, .org, .net, etc. Check out the offers when the time of your purchase.
Check the spellings before you proceed to the next step.

Step 4: Add and Continue to Cart
Once you have selected your domain name, click on the Add to cart and then proceed by selecting “Continue to Cart” option.


Step 5: Selection of years, Privacy, Hosting
In this step, you have to select few options as per your requirement.
Number of Years: You can select from minimum 1 year to maximum 10 years for your domain registration. If you have paid for 1 year, then you need to renew your domain name after 1 year. If it is 2 years, then you have to renew after 2 years. However, the price depends on the ongoing offers at that time.
Privacy: If you want to keep your contact information private, then you need to pay extra charges for that. If not, you can leave it public.
Hosting: If you are interested in Godaddy hosting, then you can buy it here or with some other ongoing offer where you can get a free domain when purchasing of hosting. However, it all depends on the Godaddy ongoing offers. I suggest you do some research before selecting the hosting platform.
Once you have selected, click on “proceed to checkout” option.

Step 6: Create Godaddy Account
Once you are done with a selection of Proceed to checkout option, you will be redirected to the Godaddy sign in a page. As you are a new customer, create a new Godaddy account now by filling the details. Here, use the Gmail account you have created at the start.

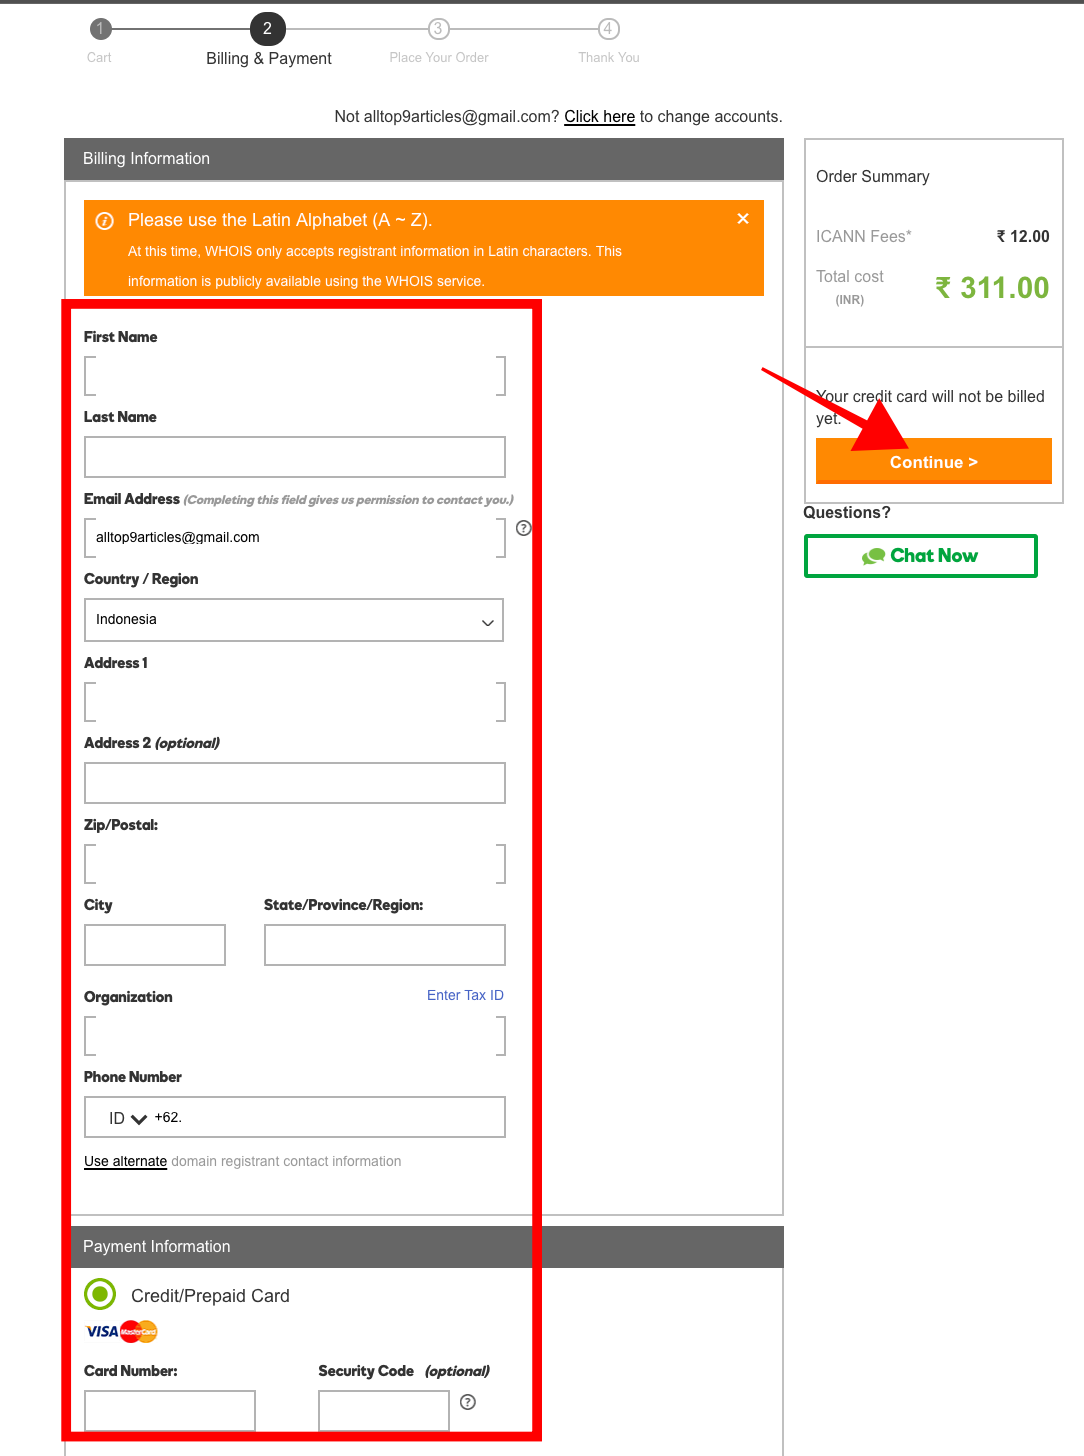
Step 7: Enter Payment Details
Once you have created the account, automatically it redirects to the billing information. Fill all the details that are necessary and enter the Credit/Debit card details then click on the “Continue” option.
Step 8: Pay the Amount
Pay the amount that has to be paid and place the order. That is it. You have successfully purchased the domain on your own.
To use the domain, you need to verify your Godaddy account. The verification Email will be sent to your Gmail account. Click and verify your Godaddy account.
That’s it! All is set to put your domain to use.
This is how we purchase the Godaddy domain name online from Godaddy.com website. I hope this article will help you to buy a domain name without any problem.
If you are facing any issues while purchasing your domain name let us know in the below comment section. We will get back to you as soon as possible to solve all your queries.
Would you like to add any other important points to this article? Then write them to us through contact us page and we will include them in the article once it is verified.
Which site do you prefer to buy Domain name online?


