
The Two-step verification is one of the widely used security systems to protect our accounts and increase their security.
Ways on How to Add Two-Step Verification in a Windows 10 PC or Laptops
These days It is obligatory to double-check while logging in to any account or application on a system that ensures that only the owner of that particular account can be logged in and denies any other person trying to log into your account.
The two-step verification is done by sending a code to the registered mobile number or an Email.
Till now we have seen two-step verification for Gmail, Facebook, WhatsApp, WordPress. In this article, we are going to show you about how we can add two-step verification in our Windows 10 PC or Laptop. Although Microsoft offers to protect our Microsoft account by activating two-step verification, the truth is that the latest version of the operating system, Windows 10, does not yet have this feature natively. So, let’s show below how we can add the verification in two steps in Windows 10 to protect the access to our system from strangers.
- How to setup Two-Step Verification in WhatsApp Android/iOS Devices
- How to Enable Facebook Two-Step Verification
- Advanced Gmail 2-Step Verification Settings for better Security by Google
Add Two-Step Verification in Windows 10 with SassPass
To do this, SassPass is the app which helps us to add two-step verification system in Windows 10 and other services or applications. We have to install SassPass software in both our mobile phone and on the computer. Therefore, the fist thing we are going to do is to install SassPass on the mobile from the official platform corresponding to the operating system that we have in the mobile since it is available for both iOS, Android and Windows Phones.
Steps to Enable Two-Step Verification in Windows 10 with SassPass
Here are the steps to add Two-step authentication in our Windows 10 PC or Laptop.
Step 1:
Go to the SassPass official site and download the SassPass app to your mobile and install the application. Another method to install SassPass in your mobile is from Appstore for iOS and Google Play store for Android mobile users.

Step 2:
Once you have installed the app, it asks you to set the pin with 4 digits to access the application. Select the passcode as a password for your SassPass account and confirm it.

Step 3:
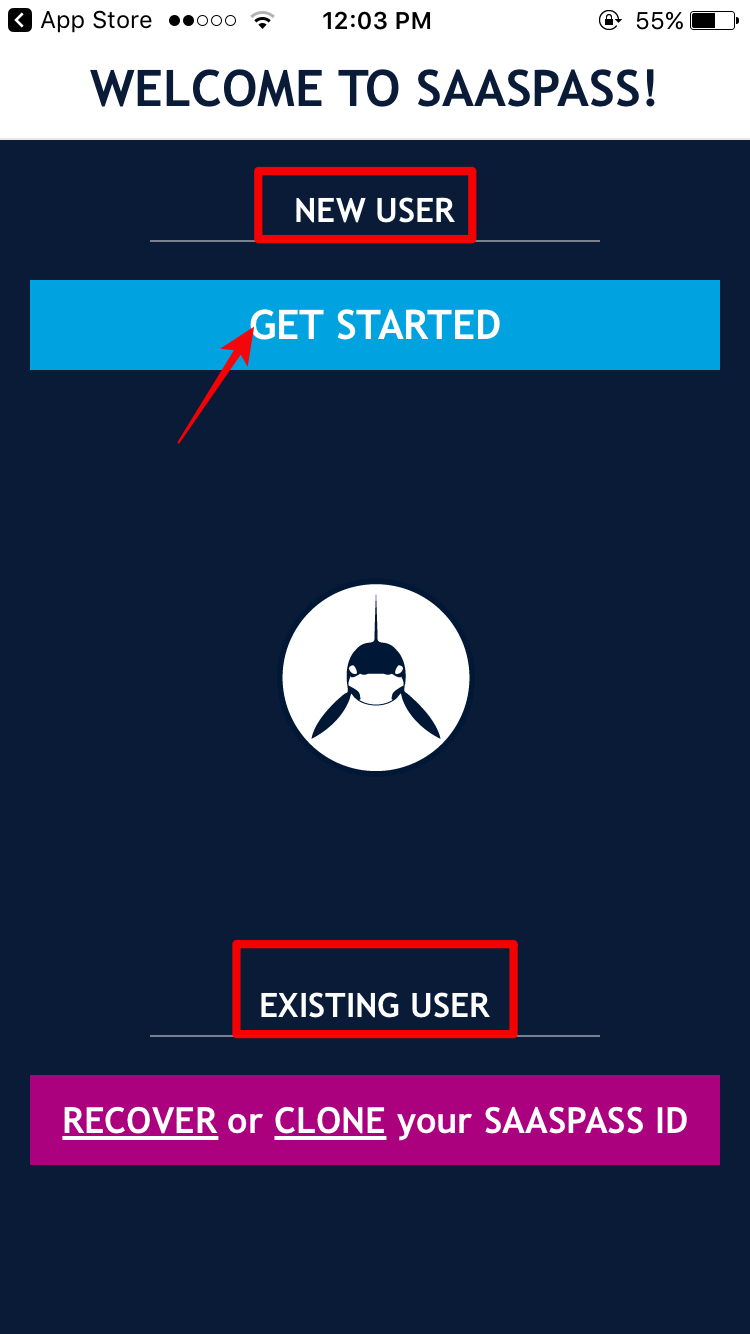
Once you are done with the pin creation, you are asked to create a SassPass account which will be the identification code to synchronise the mobile with the computer. If you are an existing user, you can use that account. If you are a new user click on the new user.
Step 4:
SassPass will ask you few accesses. Read and accept the conditions which are required for you and deny which you don’t want to. SassPass account is successfully created.

Step 5:
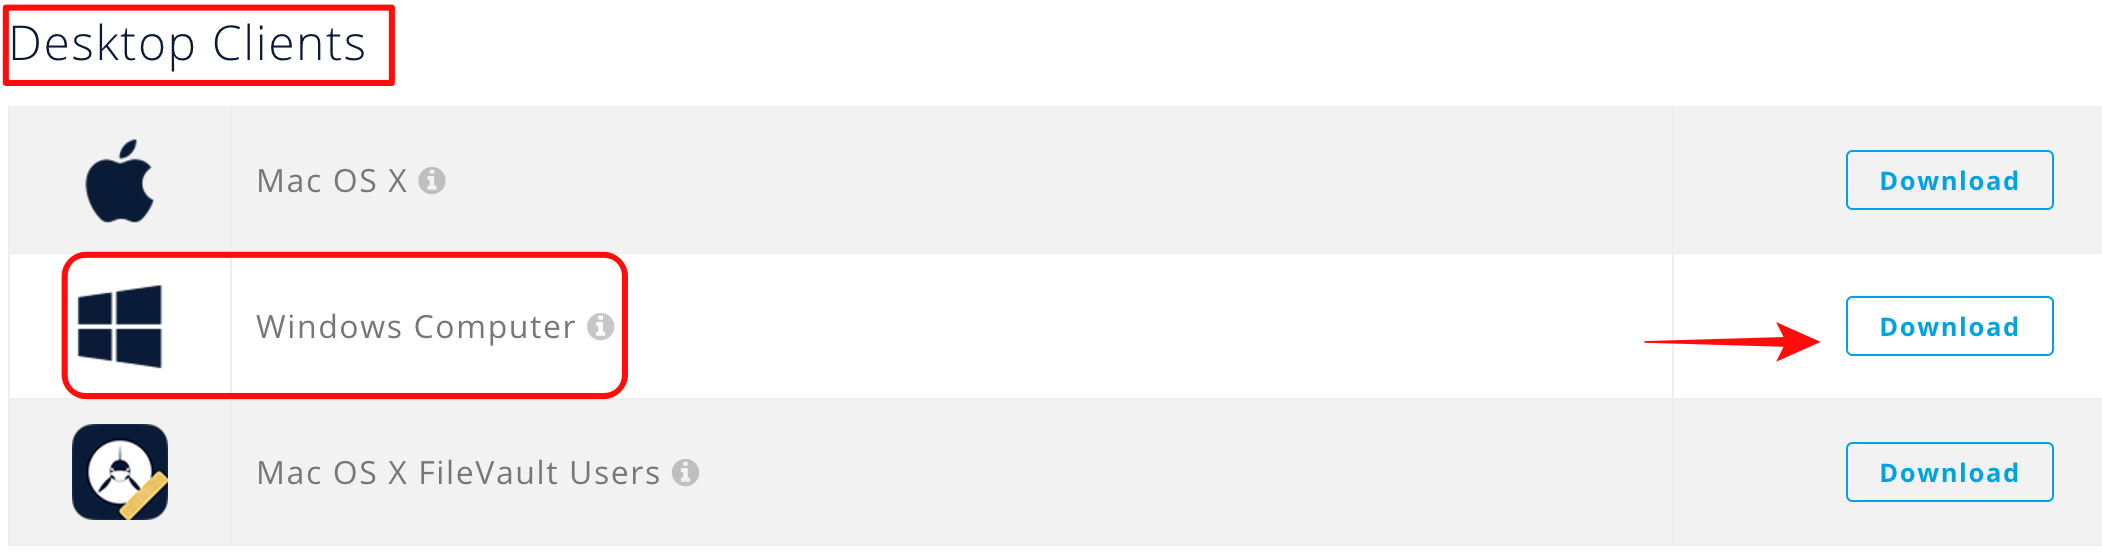
Now, download and install the SassPass on your Windows 10 from its official website. You can also use SassPass for Mac OS systems.
Step 6:
Once you have installed the SassPass on your computer, launch the application on the desktop and indicate the SassPass ID that shows us the application on the mobile along with the unique password that SaasPass shows us on our mobile screen.
Note that this password changes after a few seconds for security reasons. So, we must enter it before it changes to perform a correct synchronisation between both the devices.


Step 7:
Once the synchronisation is made correctly go to your mobile app and enter the Access to the computer option and there you can see the information corresponding to your computers such as computer name, email account used for a user account and even it has access to remote lock options.
After accepting the login request, the SassPass client on the PC will prompt us to enter the Windows password to store it in its database. Therefore, we must indicate it and then click on the Activate button that is shown at the bottom of the windows.

Step 8:
That’s it! Now we have activated the Two-Step verification in our Windows 10 PC or Laptop. Now, restart your computer or log out to return to the Windows 10 login screen and check if you have configured everything correctly.
If everything is configured correctly, you will see how the login screen showing a new field just below the windows user password field and a QR code in the upper right of the screen. Isn’t it awesome?
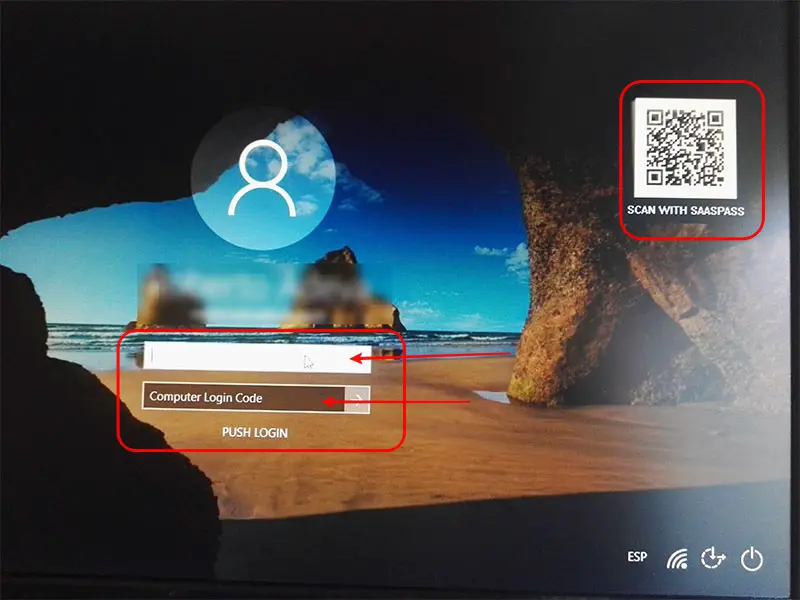
We will be able to log into Windows 10 indicating our Windows user password and then the password or Temporary Pin that shows us in the SaasPass mobile application or scan the QR code that appears on the Windows login screen 10 from the mobile application by tapping on the QR code that appears just above the SaasPass ID on the main screen.
Terms of SassPass:

In this way, we are able to add two-step verification to our Windows 10. I hope this article helps you to increase security to your Windows 10 PC. If you have any queries while performing the above process, let us know in the below comments. We will solve all your questions as soon as possible.
If you know any other applications or methods to add two-step verification to our Windows 10 PC or Laptop let us know the comment section below.
Which method do you use to login to your Windows 10 PC/Laptop?


