

Of all the challenges that the general user has with the configuration of iCloud, without a doubt the management of the photographs is the greatest. There is often confusion between what is in the iCloud and what is stored locally, and the settings of the devices do not usually clear up doubts.
And for many users, as we have seen in our section of AllTop9 Answers, deciding to download all the photographs from the iCloud library can even increase the confusion if it is not done correctly. So let’s look at how we can achieve this without reducing the quality of our images.
How to export the Photos from the iCloud library to Mac
If you want to download all the photographs from your iCloud storage drive, we are going to assume that you have the photo library in iCloud activated, so that all your devices see and manage collections in the cloud. So on your Mac, open the Photos application and in your Preferences (tab iCloud) confirm that you have that Photo library in iCloud activated.
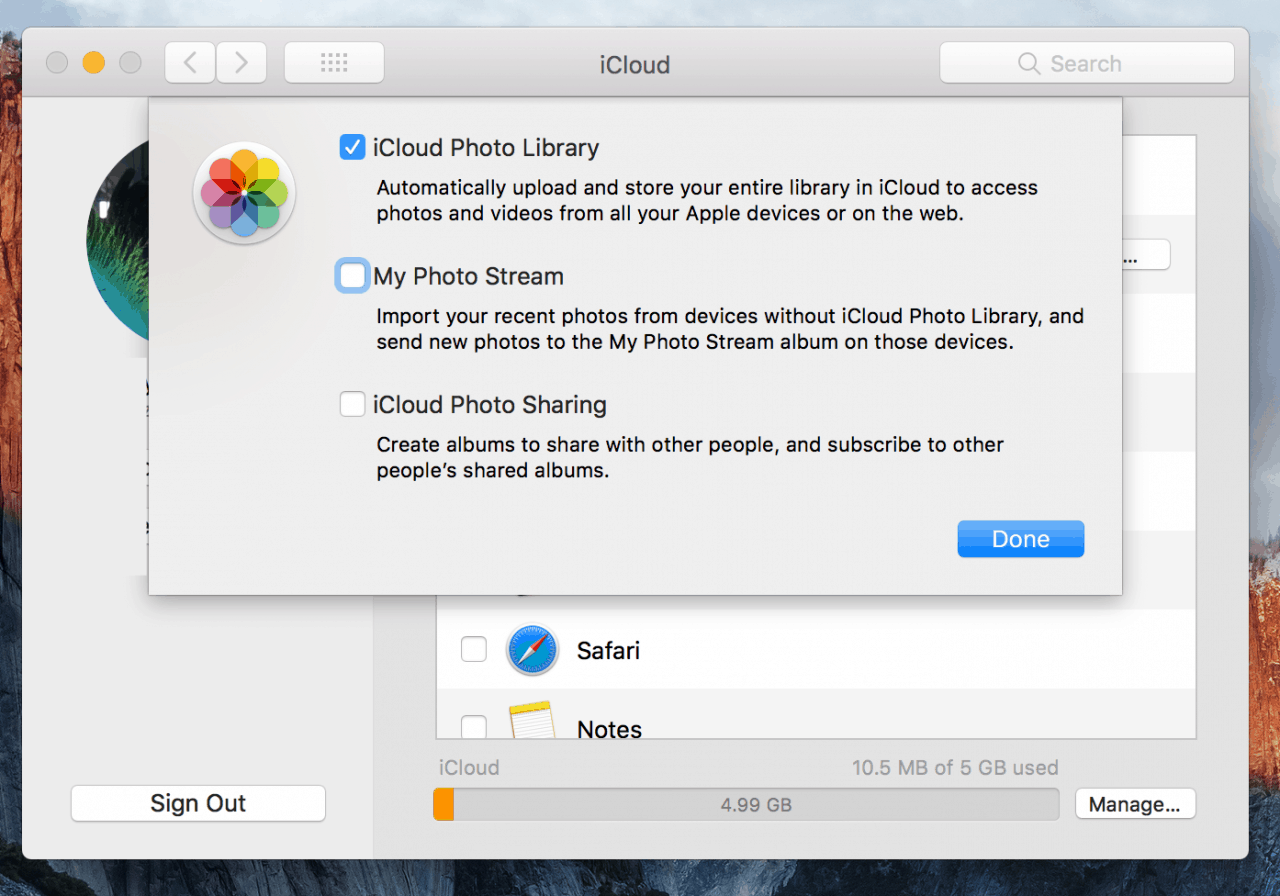
The important thing is to make sure that you have activated the option ‘Download originals on this Mac’. If you use the option ‘Optimize storage of the Mac’ you can export the photographs, but if your computer is short of free space that export will be made with lower quality versions of your original photographs which we do not want to happen.
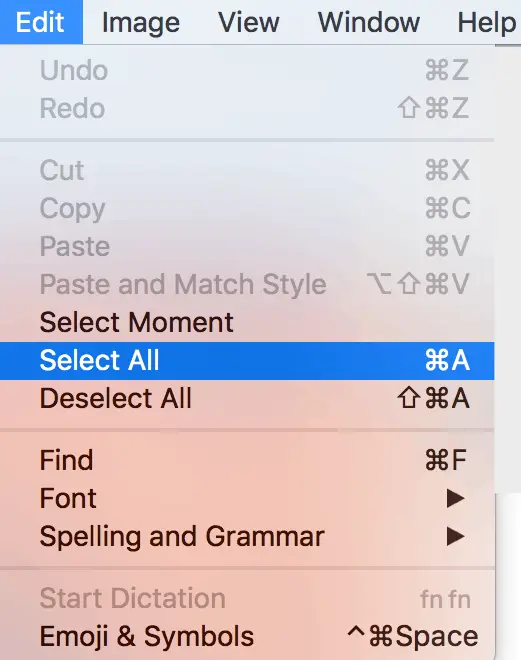
Next step. Go to edit menu, ‘Select all’ to take all the photographs of the collection. If your photo library is very large then be patient and give your computer a few seconds to complete the task.
Now go to the File menu, select ‘Export’ and we have two options to consider.

- ‘Export N items’, where N is the total number of photographs and videos that you have in your photo library, you will export all those photographs and videos in their original quality. But if you have edited a photograph using the application’s own tools, the edited image will be exported and not the original image.
- ‘Export original unmodified for N items’ will export all the images and videos, but ignoring all the editions you have made in them and therefore taking the originals without editing.

In any of the two options that we have selected, a dialogue will appear with which we can select the format of the image and the quality of the videos that we want to export. Select the highest quality so that the video is exported in its original resolution.
Also activate the option to include the location of the photo in the metadata of the image, so that if you put them back in Photos or in another photo management program they can continue to be organized according to the site where they were taken.

Finally, pay attention to the last option. If you do not want all the photographs to be exported in a single directory without any organization, you can select ‘Name of the moment’ so that a subfolder is generated for each Moment you have in the library. It is recommended if you have several thousand photographs to export.
Once you accept it, the export process will begin. Be patient, because if there are many photographs it will take some time to process and complete the task. Make sure you have enough space on your Mac to export all of them or do it directly to an external hard drive with space so that there will be no problems. Remember that the albums and slideshow that you have created in Photos will not be exported and it will be an organization layer that you will lose them on the outside of the application.


