
Smartphone photography has become increasingly popular over the years, and for good reason. With advancements in technology, smartphone cameras have evolved to a point where they can capture stunning images that rival those taken with professional cameras.
Whether you’re a beginner looking to improve your photography skills or an experienced photographer wanting to push the boundaries of what you can achieve with your smartphone, this article will provide you with valuable tips and tricks to enhance your smartphone photography game.
Understanding the Basics of Smartphone Photography

Unlocking the mysteries of captivating Smartphone Photography involves mastering both the art and science of capturing moments. Your smartphone, armed with a powerful Camera App, can become one of the best tools for creating stunning images.
When diving into the realm of smartphone photography, it’s crucial to understand the rule of thirds. This fundamental principle involves mentally dividing your frame into a grid, and placing the main subject or points of interest along these lines or at their intersections.
This simple technique can significantly enhance your smartphone photos and make them more visually appealing.
For those aiming to take better portraits, delve into your phone’s camera settings and explore the Portrait Mode. This feature, available in both Android phones and iPhones like the iPhone XS, creates a background blur that adds a professional touch to your images, making your subject stand out.
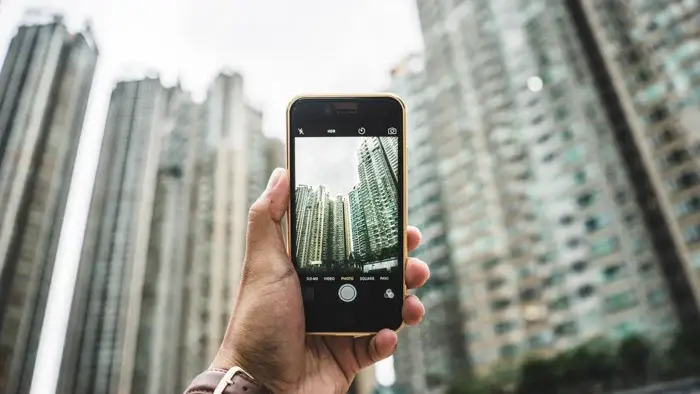
Understanding the capabilities of your phone’s camera lens is essential. Many smartphones now come equipped with multiple lenses, including a Telephoto Lens for zooming in and capturing distant scenes. Taking advantage of these features allows you to get creative with your smartphone photos.
Natural light is your ally in smartphone photography. Whether you’re shooting images outdoors or indoors, being mindful of how much light is available can make a significant difference.
If shooting in low light conditions, consider adjusting exposure settings on your phone’s camera app or explore third-party apps that offer pro mode for better control.
When it comes to editing, various third-party apps provide a range of functionalities. From adjusting shutter speed to creating time-lapse videos, these apps empower you to unleash your creativity and enhance the quality of your mobile photos.
Experimenting with HDR (High Dynamic Range) mode can result in striking images. HDR captures multiple exposures of the same scene and automatically converts them into one photo, ensuring that both the bright and dark areas are well-balanced.
For those who want to take their smartphone photography to the next level, consider exploring manual settings. Pro mode, available in some phones, allows you to adjust settings like shutter speed and ISO, providing greater control over the final image.
Remember, the best photos often come from understanding not just your camera, but the fundamentals of composition. Whether you’re focusing on leading lines, negative space, or the viewer’s eye, these principles can guide you in capturing good pictures that tell a story.
Smartphone photography is an art that combines technical proficiency with creative intuition. With the right knowledge and a keen eye, you can transform your mobile device into a powerful tool for capturing the beauty of the world around you.
The Importance of Lighting in Smartphone Photography
Lighting plays a crucial role in photography, and with smartphones, it’s no different. Ensure that your subject is well-lit by taking advantage of natural light whenever possible.
Shooting outdoors during the early morning or late afternoon can provide you with soft, warm light that adds a beautiful touch to your photos. Avoid harsh midday sunlight, as it can cause unflattering shadows and overexposed images.
But what about indoor photography? Well, when shooting indoors, you can make use of various lighting techniques to create the desired effect.
For example, you can experiment with different light sources such as lamps, candles, or even fairy lights to add a warm and cozy ambiance to your photos.
You can also try using reflectors or bounce cards to redirect and soften the light, creating a more flattering and professional look.
Another important aspect to consider when it comes to lighting in smartphone photography is the direction of light. Front lighting, where the light source is behind you and illuminates the subject from the front, is the most common and straightforward lighting technique. It ensures that your subject is well-lit and minimizes any unwanted shadows.
However, don’t be afraid to experiment with different lighting angles. Side lighting, where the light source comes from the side, can create dramatic shadows and add depth to your photos.
Backlighting, where the light source is behind the subject, can create a beautiful halo effect and add a sense of mystery to your images.
Exploring the Rule of Thirds in Smartphone Photography

The rule of thirds is a composition technique that can significantly improve the visual appeal of your photos. By dividing the frame into a 3×3 grid, you can place your subject off-center, creating a more balanced and visually appealing image.
Many smartphone cameras have the option to display the gridlines on the screen, making it easier for you to adhere to the rule of thirds.
But why does the rule of thirds work? Well, our eyes are naturally drawn to points of interest that are off-center rather than in the middle of the frame. By placing your subject along one of the gridlines or at the intersection points, you create a more dynamic and engaging composition.
However, it’s important to note that rules are meant to be broken. While the rule of thirds is a great guideline to follow, don’t be afraid to experiment and break the rules when it comes to composition.
Sometimes placing your subject dead center or using unconventional framing can create a powerful and unique image.
Maximizing Your Smartphone Camera Settings
Now that you understand the basics, let’s explore how you can maximize your smartphone camera settings to capture even better photos.
When it comes to smartphone photography, there are various settings and features that can help you take your photos to the next level. In this article, we will delve deeper into two important aspects: utilizing HDR mode and understanding the role of ISO.
Utilizing HDR Mode for Better Photos
In the expansive universe of Smartphone Photography, where every click is a moment captured, unlocking the true potential of your device involves mastering the art of High Dynamic Range or HDR Mode. Let’s journey through the landscape of this remarkable feature and discover how it can elevate your photos to new heights.
Your phone’s Camera App is not just a tool; it’s a gateway to a realm of photographic possibilities. To take better smartphone photos, delve into the settings, find HDR Mode, and make sure it’s activated. This simple step can be the key to unlocking the richness and detail often missed in standard photos.
Capturing stunning images with your iPhone or Android device involves more than just pressing the shutter button. Ensure you make the most of your iPhone Camera App or the camera app on your Android phone to explore different modes, including HDR, for an enhanced photography experience.
HDR Mode becomes particularly beneficial when shooting scenes with stark contrasts in lighting, offering a sophisticated solution for both iOS and Android phones. This feature automatically converts multiple exposures of the same shot, merging them to create a photo that retains detail in both shadows and highlights.
For those looking to capture scenes with intricate details, especially in challenging lighting conditions, HDR settings on most phones, including the iPhone XS and Google Pixel, can significantly improve the outcome. It’s like having an artist by your side, ensuring every nuance of the scene is meticulously captured.
Whether it’s a breathtaking landscape or an intimate portrait, HDR Mode enhances your photos by capturing a wider range of luminosity. This can be particularly useful when shooting scenes that involve both bright and dark elements, ensuring that your photos are a faithful representation of the moment captured.
When navigating the diverse world of smartphone photography, HDR Mode emerges as a powerful ally. It’s not just a setting; it’s a dynamic tool that can turn a good photo into a great one by embracing the nuances of light and shadow.
So, the next time you aim to capture a scene that demands the utmost detail, activate HDR Mode and witness the magic unfold in your photos.
The Role of ISO in Smartphone Photography

ISO determines the sensitivity of your smartphone camera’s sensor to light. It plays a crucial role in capturing well-exposed photos, especially in low-light situations.
When aiming to take better photos, especially in challenging lighting conditions, the ISO setting on your iPhone Camera or Android device comes into play. Make sure your iPhone Camera App or the camera app on your Android phone allows you to manually adjust ISO settings, giving you the flexibility to capture stunning photos even in low light.
In the dance of photons and pixels, ISO is your ally. For those who want to take advantage of natural light and capture the essence of a scene, understanding how ISO works on your smartphone camera is crucial. It’s akin to adjusting the sensitivity of your phone’s camera to light, allowing you to navigate the intricate balance between exposure and noise.
Whether you’re shooting with the latest iPhone XS or the innovative Google Pixel, controlling the ISO settings on your smartphone camera can be the key to achieving the perfect exposure.
From capturing portrait shots with a beautifully blurred background to ensuring a sharp focus on the main subject, ISO adds a layer of sophistication to your mobile photos.
Advanced Smartphone Photography Techniques
If you’ve mastered the basics and want to take your smartphone photography to the next level, try experimenting with these advanced techniques.
Smartphone photography has come a long way, and with the right techniques, you can capture stunning images that rival those taken with professional cameras. In this guide, we will explore some advanced techniques that will help you elevate your smartphone photography game.
Mastering the Art of Composition
Composition is a fundamental aspect of photography, and it’s no different in smartphone photography. While smartphones offer convenience and portability, they also present unique challenges when it comes to composition. However, with a little creativity and experimentation, you can overcome these challenges and create visually compelling images.
One technique to try is experimenting with different angles and perspectives. Instead of shooting from eye level, try getting down low or shooting from a higher vantage point. Changing your perspective can add a unique and interesting element to your photos.
Framing is another important aspect of composition. Look for natural frames within your environment, such as archways, windows, or tree branches, and use them to frame your subject. This can add depth and visual interest to your photos.
Don’t be afraid to break the rules and try unconventional compositions. Sometimes, the most striking images are the ones that defy traditional composition guidelines. Remember, the only limit is your creativity!
Tips for Capturing Stunning Portraits

Smartphone cameras can capture remarkable portraits, but it’s crucial to pay attention to the details. To take your portrait photography to the next level, consider the following tips:
First and foremost, lighting is key. Natural light is often the most flattering for portraits, so try to find a well-lit area or shoot during the golden hour, which is the hour after sunrise or before sunset when the light is soft and warm. Avoid harsh overhead lighting, as it can create unflattering shadows.
In addition to lighting, the background can make or break a portrait. Look for interesting textures, colors, or patterns that complement your subject. A simple background can help draw attention to the person you’re photographing.
If your smartphone has a portrait mode, make use of it. This feature creates a shallow depth of field, blurring the background and making your subject stand out. Experiment with different settings and distances to achieve the desired effect.
Lastly, connecting with your subject is essential for capturing stunning portraits. Take the time to engage with them, make them feel comfortable, and capture their unique personality. A genuine smile or a candid moment can elevate your portrait photography to new heights.
By mastering the art of composition and implementing these tips for capturing stunning portraits, you’ll be well on your way to creating professional-looking photos with your smartphone. Remember, practice makes perfect, so don’t be afraid to experiment and push the boundaries of what’s possible with your smartphone camera.
Editing Your Smartphone Photos

Editing is an essential part of the photography process, and with the right tools, you can turn your good photos into outstanding ones.
Introduction to Photo Editing Apps
There are numerous photo editing apps available for smartphones that offer a wide range of features and capabilities. Experiment with different apps to find the one that suits your editing style.
Look for apps that offer tools for adjusting brightness, contrast, saturation, and other editing options to enhance your photos.
Enhancing Photos with Filters and Effects
Filters and effects can add a creative touch to your smartphone photos. From vintage film looks to vibrant color-pop effects, explore the variety of options available and use them to enhance the mood and style of your images.
However, use filters and effects sparingly to avoid over-editing and distorting the natural beauty of your photos.
Overcoming Common Smartphone Photography Challenges

Despite their many advantages, smartphone cameras also present challenges that photographers must overcome to capture outstanding photos.
Dealing with Low Light Conditions
Low light conditions can result in blurry and noisy images. However, by utilizing the available light and employing techniques such as using a tripod, adjusting exposure settings, and experimenting with long exposure shots, you can overcome the challenges and capture captivating images even in low light.
Avoiding Blurry Images
Blurry images are a common issue in smartphone photography, especially when capturing moving subjects or shooting in low light. To reduce blurriness, ensure your smartphone is steady by using a tripod or resting it on a stable surface.
Additionally, consider using burst mode or a dedicated sports mode if your smartphone offers these features to increase your chances of capturing crisp and sharp images.
With these tips and tricks, you can elevate your smartphone photography to new heights. Remember to practice, experiment with different techniques and settings, and most importantly, have fun capturing the world through your smartphone lens. Happy shooting!

