

Have you ever backed up on your Windows Operating System? The built-in backup utilities in Windows are pretty solid.
Easy Steps to Create a System Image Backup in Windows 7, 8, and 10
So, in this tutorial, we shall discuss the step by step process of how to create a full backup image of your Windows 7, 8, and 10 PC without the need for a third-party utility.
Normal backup programs, like CrashPlan or Windows’ built-in File History feature, essentially copy your files to another location. A system image backup, on the other hand, is like a full snapshot of an entire hard drive. The advantage of a system image is that if a hard drive crashes, you can replace it, restore the image, and have your system right back to where it was when the image was captured. No need to reinstall Windows or your apps.
What is a System Image Backup?
A system image is a backup that contains a file or set of files that contains everything on a PC’s hard drive, all of your installed programs, system settings, and files. A system imaging program looks at the hard drive, copying everything bit by bit. You then have a complete system image you can copy back onto a drive to restore the system state.
You can use a system image to restore Windows and software when your PC or hard disk stops working, or when your computer is infected by malware, or when your Windows isn’t working properly. The system image contains a complete snapshot of everything on the computer’s hard drive at any given time. You can store the system image on a second internal hard drive (installed in your computer), an external hard drive, USB flash drive, on one or more DVD,s or on a network location.
Cloud Backup Robot – Best Backup Software for SQL Server with Amazing Features
The biggest disadvantage with system image backups other than taking a bit longer is that you can’t restore the backup to a different PC. You’re creating an image of your full Windows installation and, since Windows is set up specifically for your hardware, it just won’t work as-is on another PC. It would be like trying to plug your hard drive into another PC and expecting everything to load well.
Steps to Create a System Image Backup In Windows 7
1. Click on the start menu button, go to “Getting Started” and choose “Backup your files”.
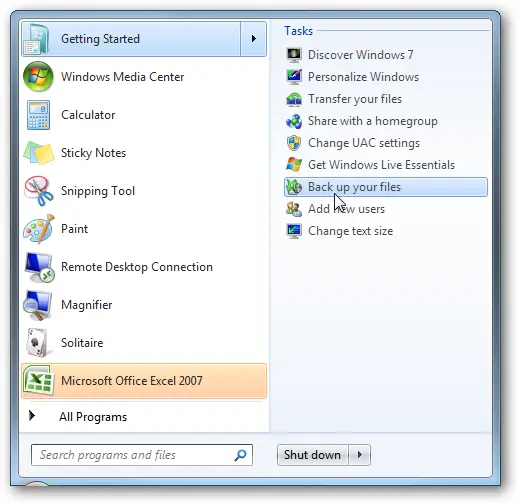
2. Click on “Create a system image” located at the top left.

3. Select where you want to save the backup.
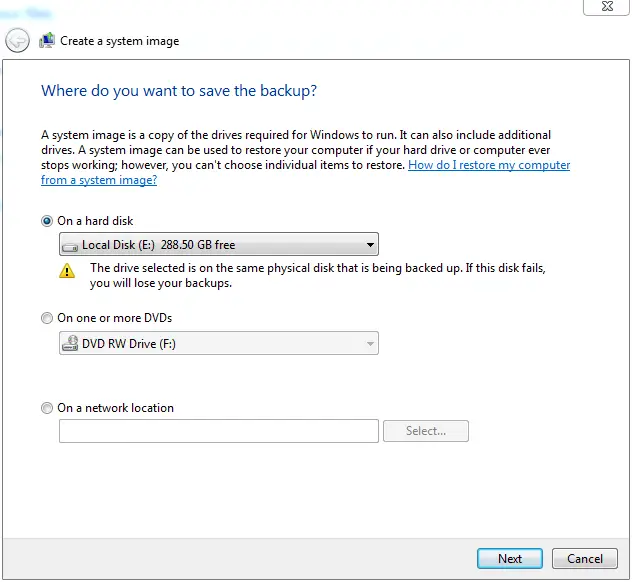
- On a hard disk (recommended).
- On one or more DVDs.
- On a network location.
4. The following step depends on the backup option you’ve selected:
- If you selected On a hard disk, then connect your external hard drive now. If it doesn’t appear, then click on “Refresh”.
- If you selected On one or more DVDs, then insert the first blank DVD into the DVD burner drive of your PC.
- If you selected On a network location, then click on “Select”, enter the location, username, and password, and click on “OK”.
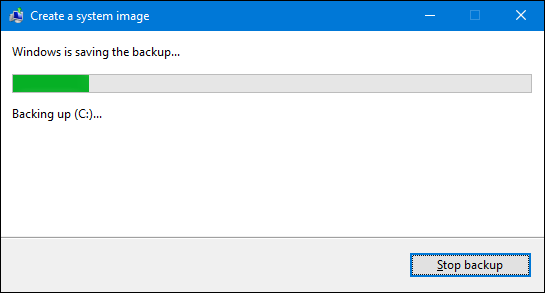
5. Click “Next” and “Start backup”. Windows will now create your system image backup.
After the process is completed, you get the option to create a system repair disc and you should use this option. A system repair disc can be used to boot your system.
 It also contains Windows system recovery tools that can help you recover Windows from a serious error or restore your computer from a system image. To create a system repair disc, just select a CD/DVD drive, insert a blank CD or DVD into the drive and click on “Create disc”.
Procedure to Create a System Image Backup In Windows 8, 8.1 & 10:
1. Click on the start menu button and choose Control Panel > System and Security > File History > System Image Backup.

2. Click on “Create a system image” located at the top left.

3. Select where you want to save the backup.
- On a hard disk (recommended).
- On one or more DVDs.
- On a network location.
I always save my system image backups to an external hard drive.
4. The following step depends on the backup option you’ve selected: If you selected On a hard disk, then connect your external hard drive now. If it doesn’t appear, then click on “Refresh”.
- If you selected On a hard disk, then connect your external hard drive now. If it doesn’t appear, then click on “Refresh”.
- If you selected On one or more DVDs, then insert the first blank DVD into the DVD burner drive of your PC.
- If you selected On a network location, then click on “Select”, enter the location, username, and password, and click on “OK”.

5. Click “Next” and “start backup” and Windows will now create your system image backup.
After the process is completed you get the option to create a system repair disc and you should use this option. A system repair disc can be used to boot your system. It also contains Windows system recovery tools that can help you recover Windows from a serious error or restore your computer from a system image. To create a system repair disc, just select a CD/DVD drive, insert a blank CD or DVD into the drive and click on “Create disc”.
Recover a Permanently Deleted Files Without Using any Software on Windows 7, Windows 8 and Vista
Restore the backup
When Windows is in a hopeless condition, you’ll need to get into the recovery environment to restore the image. Here are three ways to do that:
- If you can still boot into Windows, Select Start > Settings > Update & security. Select Recovery in the left pane, then select Restart now.
- If Windows won’t boot and you have a System Repair Disc, Insert the disc into your optical drive and boot your PC. When you’re asked to “Press any key…,” press any key. Then pick a language.
- If Windows won’t boot and you have a Recovery Drive, Insert the Recovery flash drive into a USB port and boot your PC. If your PC skips the flash drive and attempts to boot Windows, reboot and enter your Setup screen (F2 usually works; if it doesn’t, check your manual).
- Look for a boot or boot order option. Once you’ve successfully booted the flash drive, select a language.
Once you’re in a recovery environment, select Troubleshoot, then System Image Recovery. Follow the instructions. Creating an image backup can take some time, so it’s best to do it when you won’t need your computer for a few hours or overnight.
These are the steps to create a System Image Backup in Windows 7, 8, 10. If you have any queries, let us know in the comments section below.
Which backup software or which method do you use to create a System Image in Windows 7,8,10?


